Kollab Product Guides
How to Build and Publish a Buyer Room in Kollab (Step-by-Step)
A quick walk-through on setting up custom branding, adding action plans, organizing asset groups, and publishing your Kollab buyer link.
3 min read

Tanner Randall
Founder, Kollab
Creating a co-branded buyer workspace in Kollab takes just a few minutes. Kollab guides you through a simple 4-step creation wizard so you can give prospects a single, professional link instead of sending bulky email attachments.
Here is how to set up and launch your room.
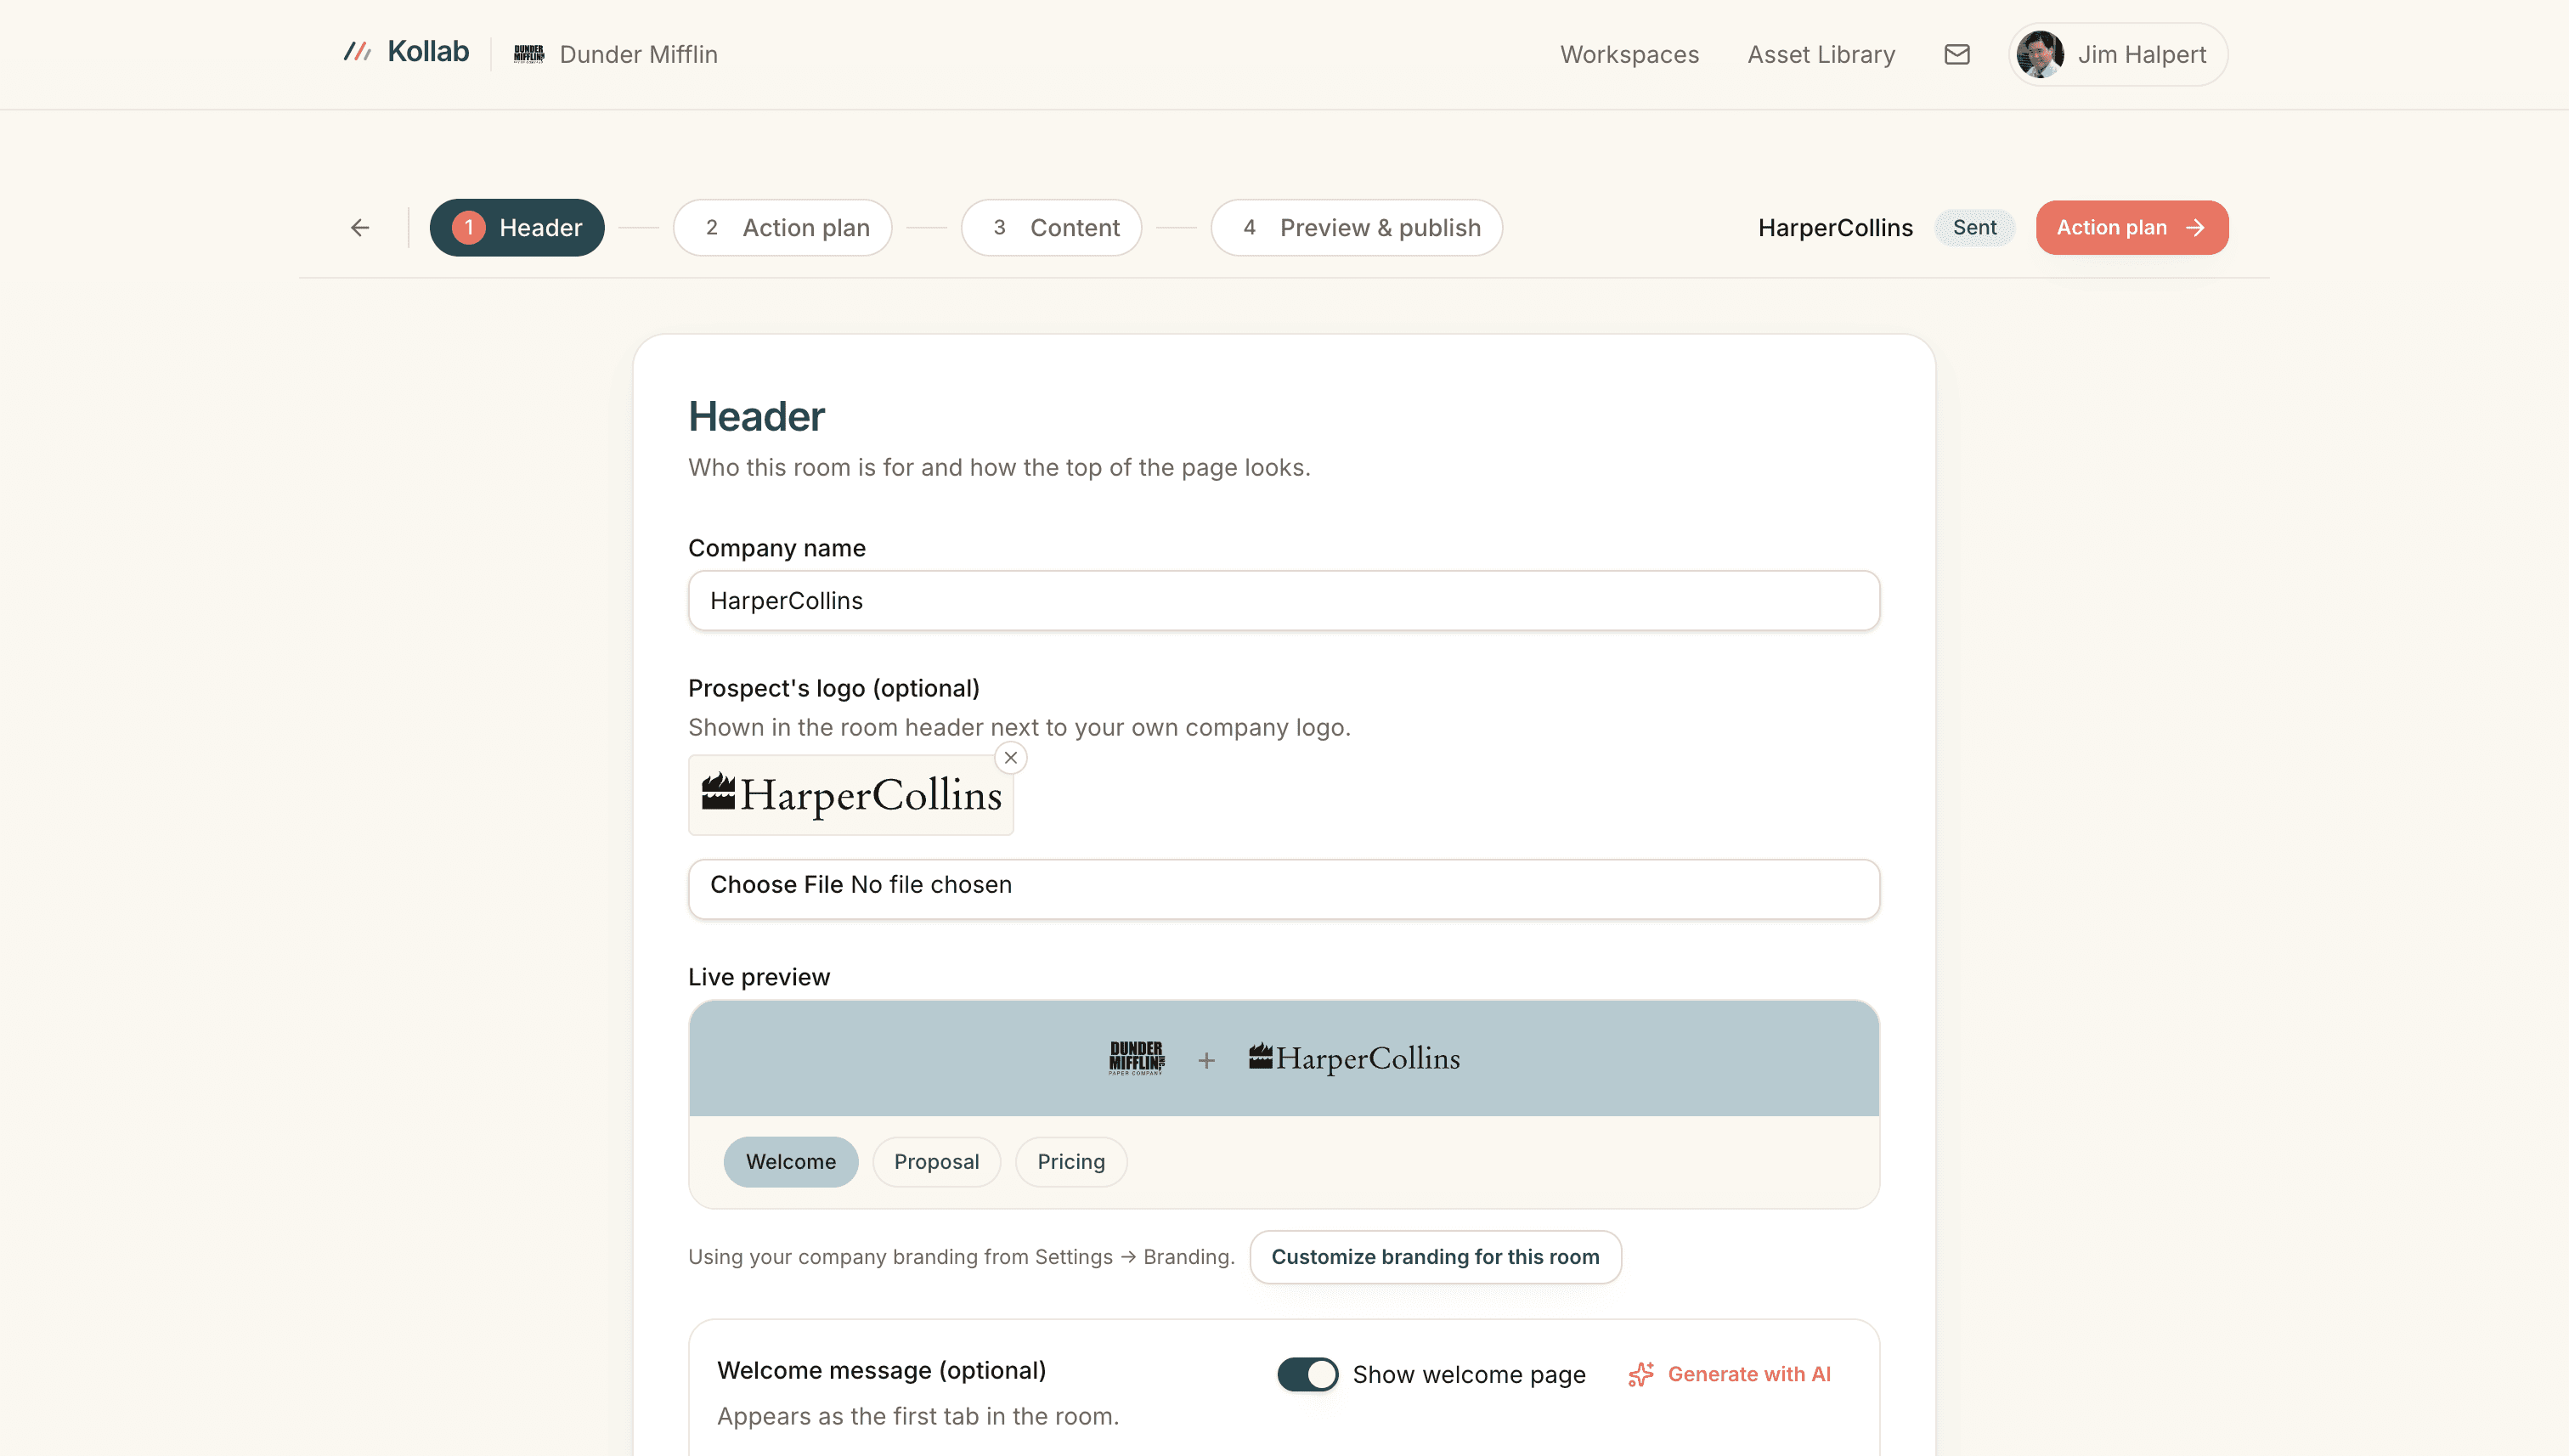
Step 1: Header & Branding
Start by personalizing the room for your prospect so it feels bespoke the moment they open it:
Company Name: Enter your prospect’s company name.
Prospect’s Logo: Upload the prospect’s logo to display it co-branded alongside your own logo in the header bar.
Branding Rules: Customize the header background color or stick to your default company branding configured in Settings ➔ Branding.
Welcome Message (Optional): Toggle on a custom welcome page to greet buyers as the first tab in the room.
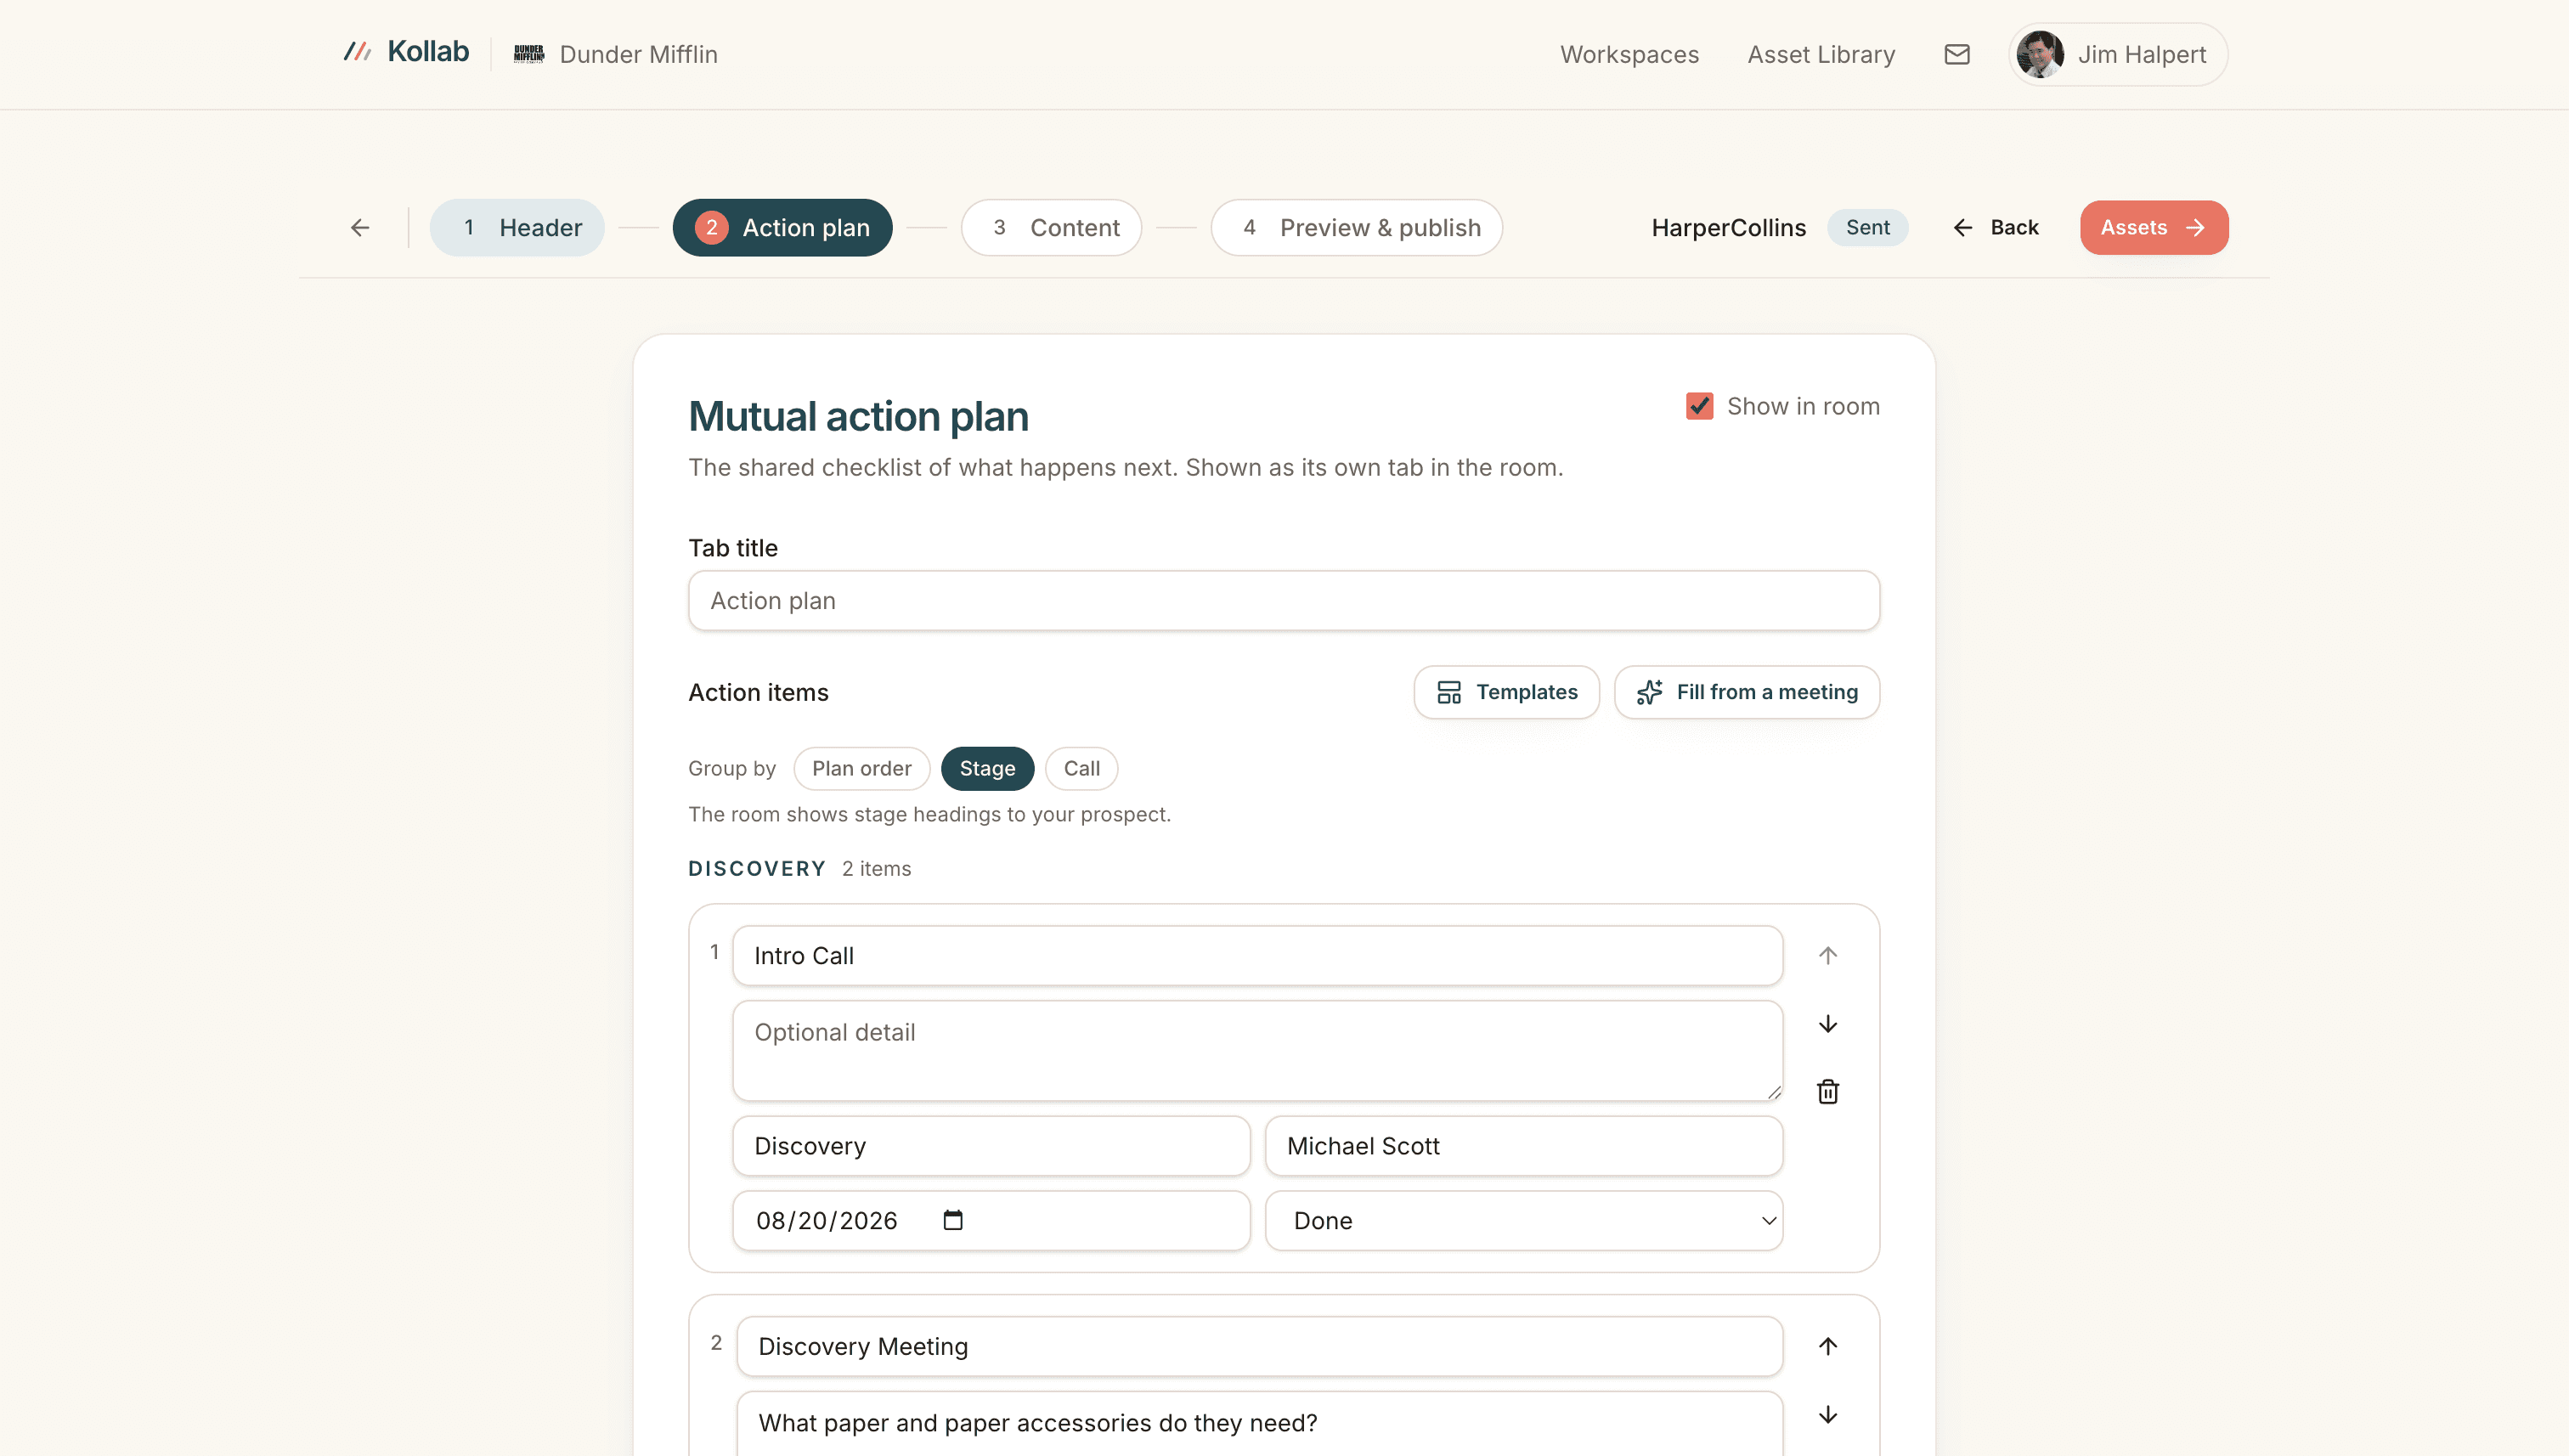
Step 2: Mutual Action Plan
Keep your deal moving forward by including a shared interactive checklist:
Action Items: Add key evaluation steps (e.g., Intro Call, ROI Review, Security Check).
Assign & Schedule: Assign owners, optional details, target due dates, and completion status (
Done,In Progress, etc.).Grouping Options: Group your action items by Plan order, Stage (e.g., DISCOVERY), or Call.
Templates & AI: Use Templates for pre-built checklists, or click Fill from a meeting to auto-generate tasks from your call transcripts.
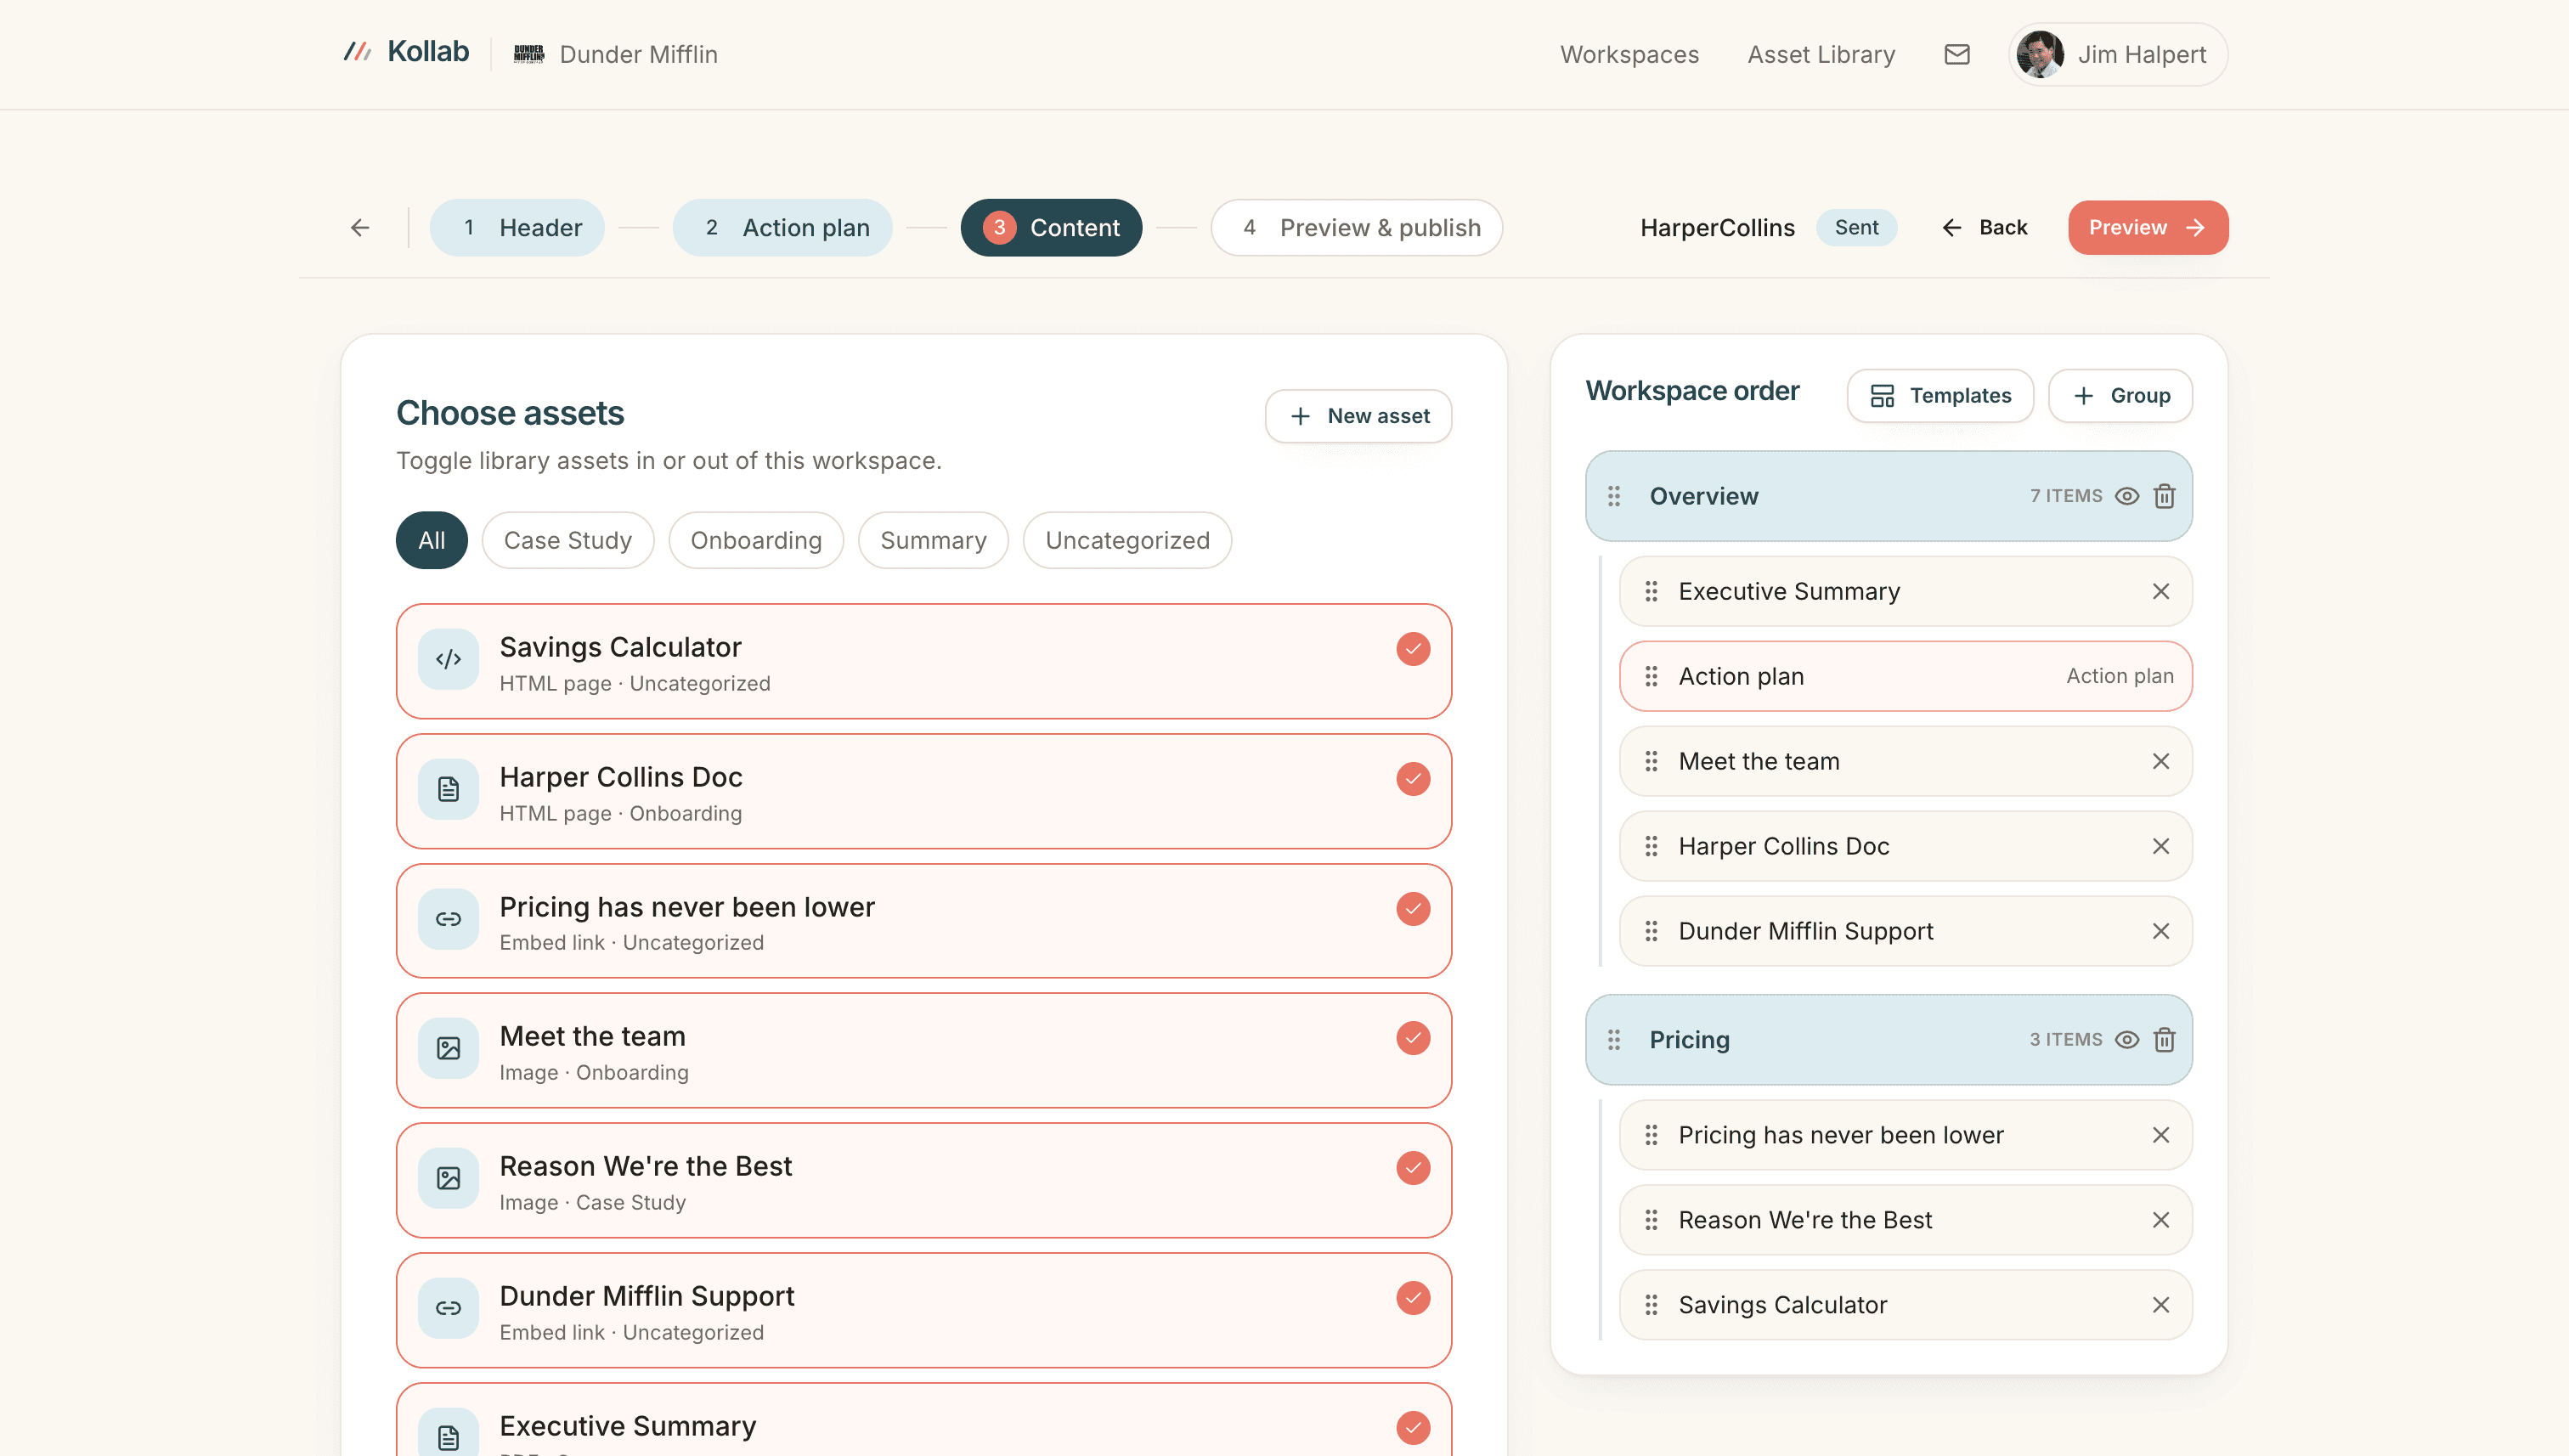
Step 3: Choose & Organize Content
Select the assets from your library that belong in this deal workspace:
Toggle Library Assets: Select HTML pages, embed links, case studies, or documents to include them in the room.
Workspace Order & Tabs: Drag and drop assets on the right panel to group them into custom tabs (e.g., Overview, Pricing).
Create New Assets: Need something new? Click + New Asset to create or upload assets on the fly.
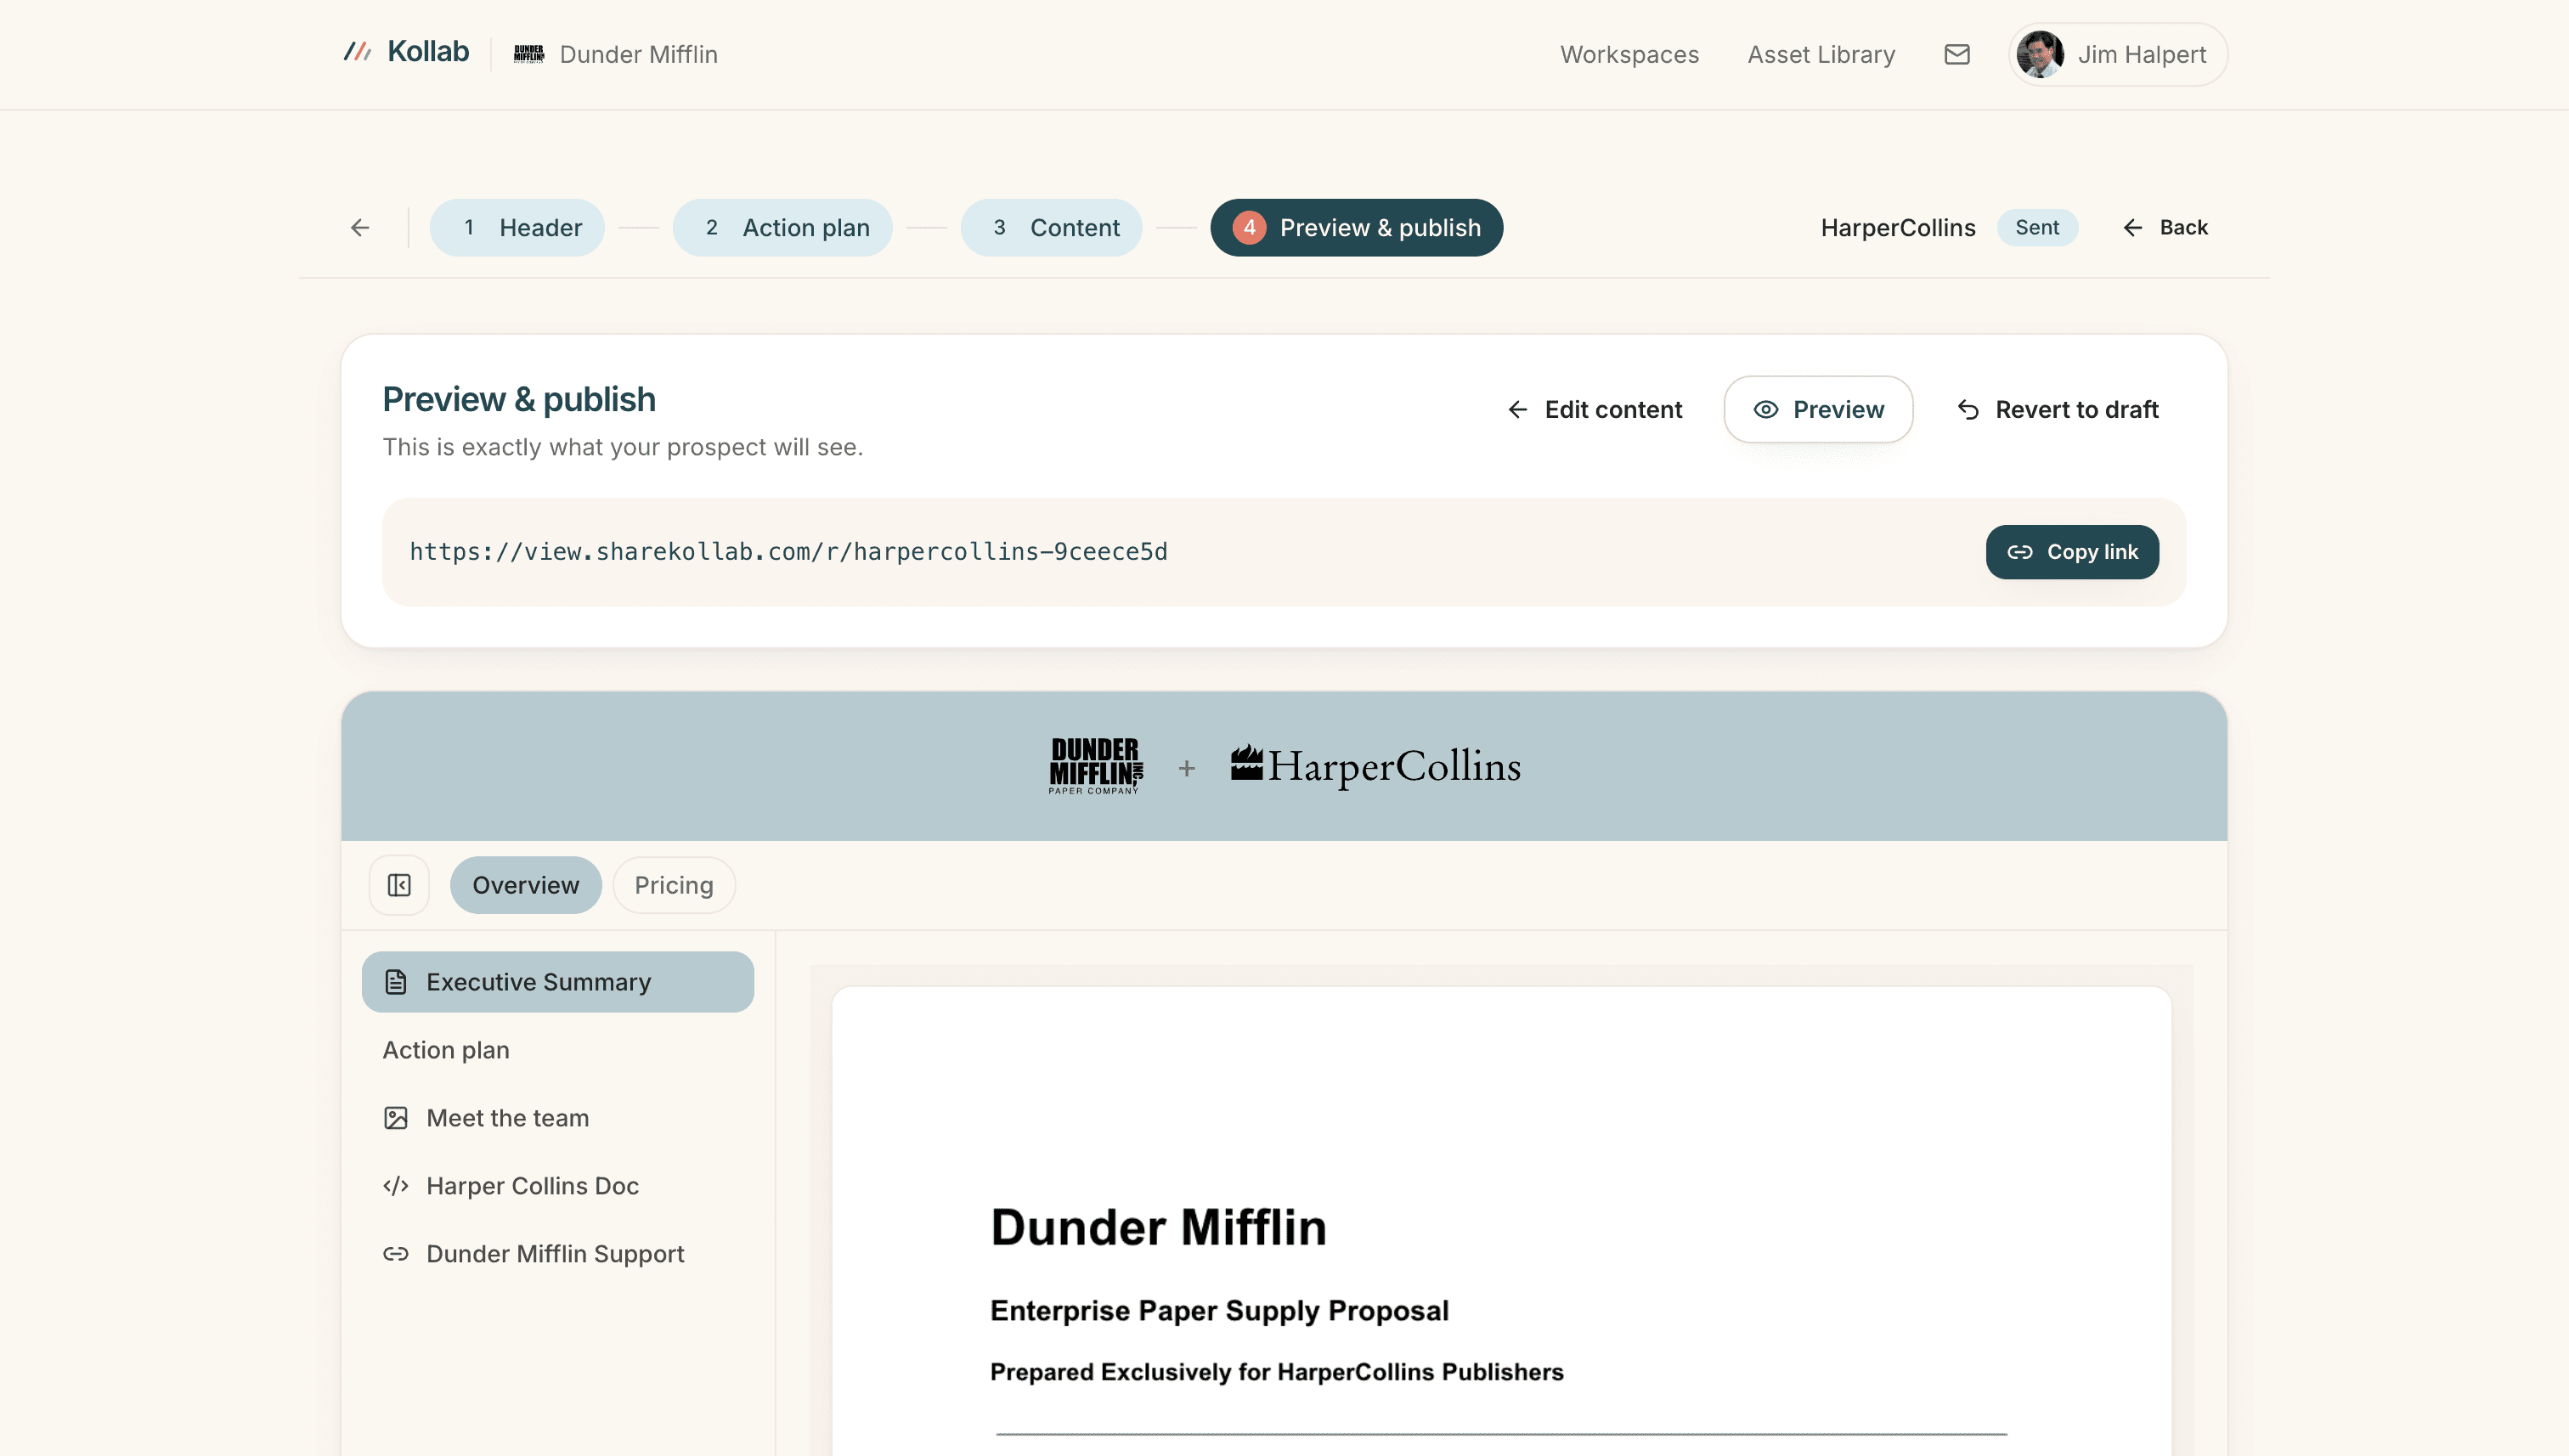
Step 4: Preview & Publish
Before sending the workspace to your prospect, review the final layout:
Click Preview to experience the room exactly as your buyer will see it.
Once satisfied, hit Publish to generate your unique view link (e.g.,
[https://view.sharekollab.com/r/company-name](https://view.sharekollab.com/r/company-name)).Click Copy link and paste it directly into your post-call recap email or Slack message.
Related: a live workspace walkthrough.
New to Kollab? The free plan covers ten workspaces with custom branding, mutual action plans, and engagement analytics. See what’s included — no card required.